If this is your first visit find the very first post in the archive and start reading there, it will make more sense.

Saturday, March 24, 2012

Rear Tire and Sprocket


The rear of the bike is almost ready to go. I received a couple more parts this week so I mounted them up.

I ordered Renthal black 48 tooth sprocket for the rear and a stock size 12 sprocket for the front.  I received the correct one for the rear but the front one was shipped wrong.  So That part will have to go back.


I decided to go with the Bridgestone tires so I ordered a M404 100/90/19.  It looks really good all mounted up.

I also ordered a Renthal R1 chain to complete the set up.  The sprocket that is on the counter shaft in the bottom photo is a 13, it is new and I will probably run it also just to see which I like better the 12 or 13.  From what I remember about gearing adding a tooth to the front is like adding 3 to the rear.  If that is not right let me know.
I still need a rear chain guide, the swing arm chain sliders as well as a mud flap. I found and ordered a chain guide today, it doesn't look to be in the best of shape but I think it is some thing I can work with.

Saturday, February 18, 2012

True That Wheel.

The Cheap way.

Zip Ties taped to the forks, give it a spin look for the movement and tighten as needed or loosen, depends on what way you need to move. I know not very informative but I figure you can figure it out if you have gotten this far.

Friday, February 17, 2012

Front Wheel Bearings

This is not so different from the rear wheel so Ill be brief.
I used a 30mm socket on this one, fits perfect.
Like I said, Ill be brief.  Put the cir clip in and press in the dust seal and BOOM! Done.

Sunday, February 12, 2012

Wheel Bearings

Its been a while since I have posted anything here.  Shortage of parts will do that to ya.  I think everyone knows money is a little tight especially for fun projects.  I was waiting for the front wheel bearings to show up and I was going to do the front and rear at the same time but decided that I would just go ahead and put the rear ones in since it looks like the fronts wont be here till mid next week.

Here the photo shows the old bearing still in the hub with the new bearings on top and the wheel spacer that I took out from the other side.  Its a pretty easy process to change bearings.  This model hub has a cir clip that holds a bearing in on one side while the other one fits very tightly.  After removing the dust seal and the cir clip the bearing on that side lifts right out then the spacer and the other bearing can then be popped out with a long socket extension and hammer.

I first put the bearing in that needed pressed into place, a 32mm socket fit perfectly into the hub allowing me to tap the bearing in only putting pressure on the outer edges of the bearing.  There is a lip on the inside of the hub that the bearing seats against so you know when it is fully in place. After that the dust seal can be put in by hand.  These are sealed bearings so no extra grease is needed.

Flip the wheel over and slide the spacer into the hub, then the next bearing can be set into place. No hammer needed on this one.


Using snap ring pliers put the cir clip into the groove followed by the dust seal. Just like that your all done.

Tuesday, January 17, 2012

Lacing the Front Wheel

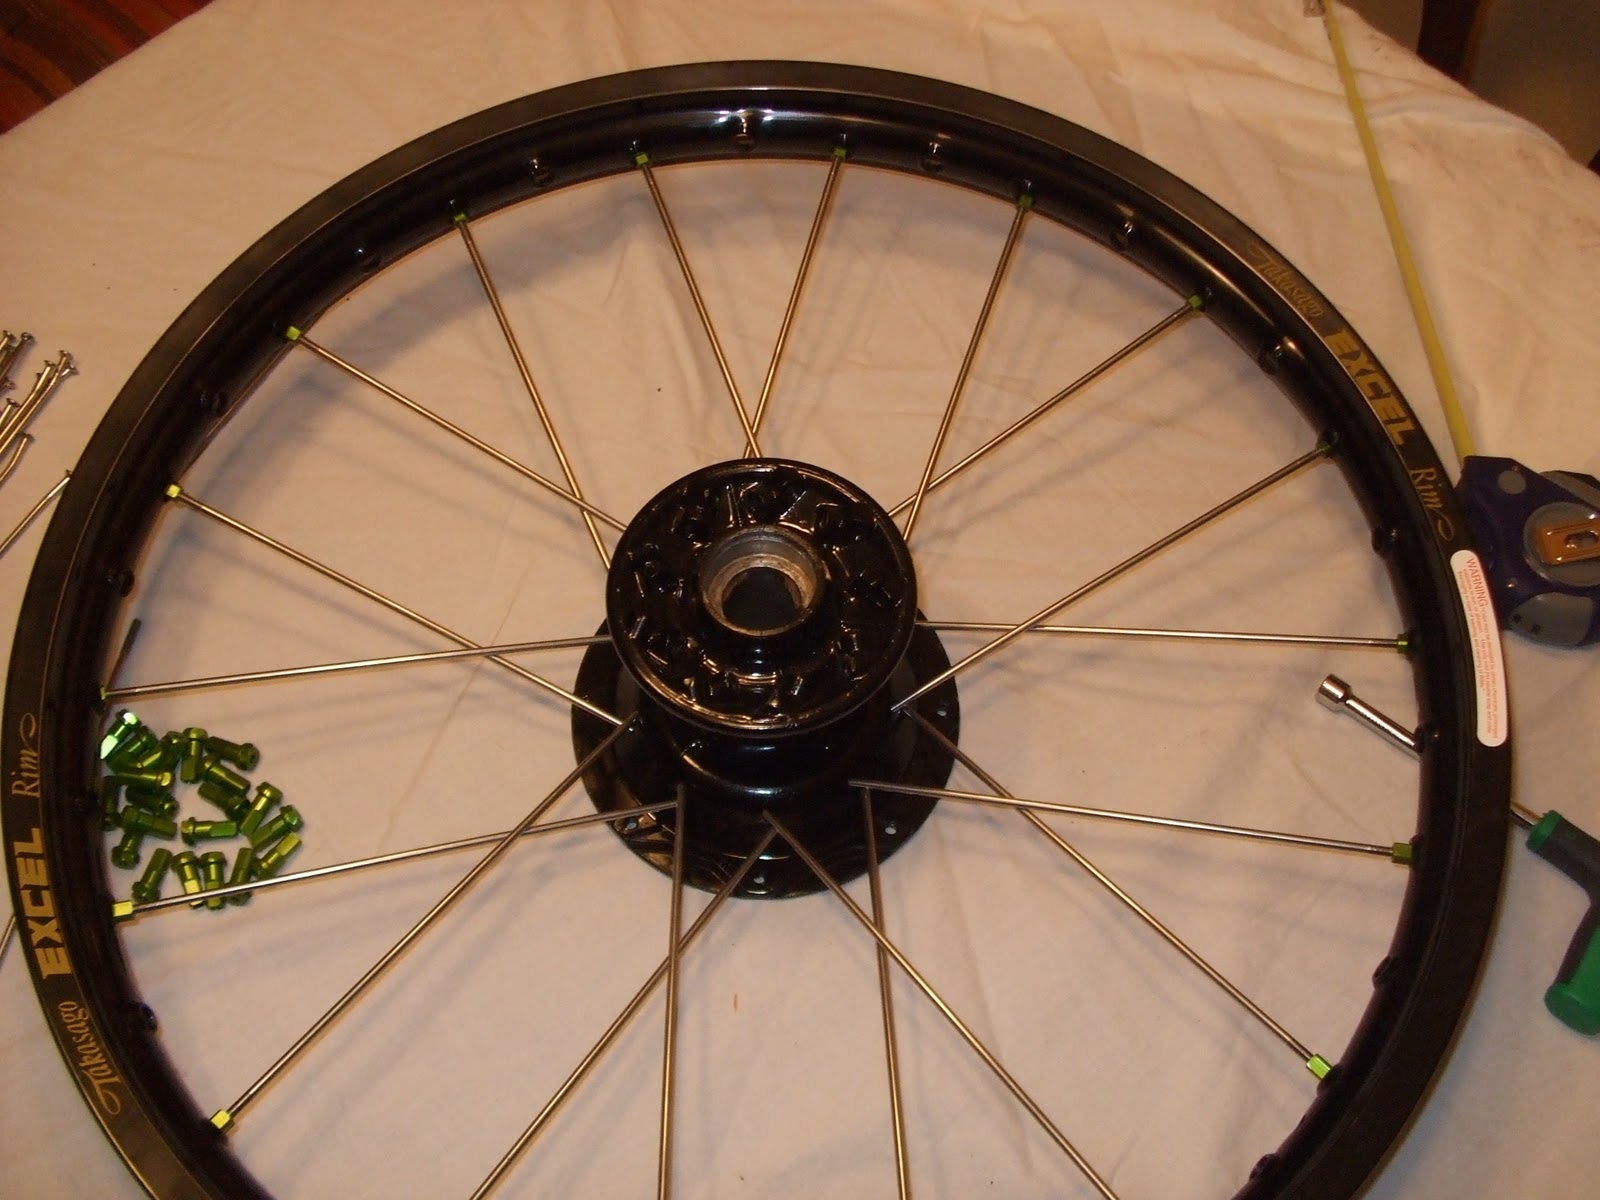
I received the parts a couple weeks ago from RAD Mfg. but its been super busy since then so I haven't been able to make the time to go out and put things together.  Well now it is cold and snow is on the ground, making the garage a might chilly and since I only have an hour or so to work no sense in putting a fire in the wood stove. So I will do what any other motorcycle enthusiast would do. Bring the project inside to the kitchen table.


When I put the rear wheel together it had been a very long time since I had attempted to string up a new rim so it was a bit of trial and error to get it all right.  This time I had a better Idea of where to start with the wheel set up and I went straight to work.  I will describe it in a bit more detail then I did with the rear wheel.
 First I slid in the spokes on one side of the hub making sure the top and bottom spokes laid in overlapping properly so they don't bind on each other.


Next I slid them into the rim making sure that each spoke hit the proper hole with the angle toward that side of the hub. I loosely put a nipple on each spoke just to hold them in the rim.


Next step was to lace each of the spokes through the other side of the hub and into the rim making sure to hit each hole in the rim with the proper angle as well as making sure the overlap of each spoke is correct. Don't want any binding.
Then with a standard tape measure I started to tighten the spokes up with just fingers and measured from the hub to the outside of the rim all the way around to center it up.  Also measured the offset of the rim while laying flat on the table and checked it against the measurement of the original wheel before I took it apart. I continued to tighten and measure until all spokes were tight with just fingers and made sure that each one was seated into the hub.  With all the spokes finger tight when I have time to put it on the forks and true and tighten the rest of the way it is already very close.  I don't have the new wheel bearings yet so I will have to wait for those as well as some extra time to get out in the garage and finish this up.